

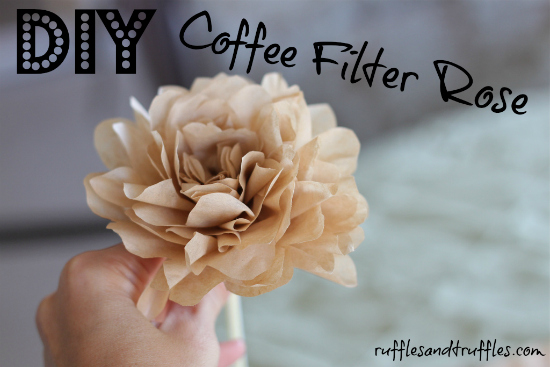
Last week, I debuted the coffee filter flower lampshade that I am oh so proud of. But, how did I create those flowers, you ask? Well, today I am going to show you how I created one of the two flower styles used in the lampshade: the rose!
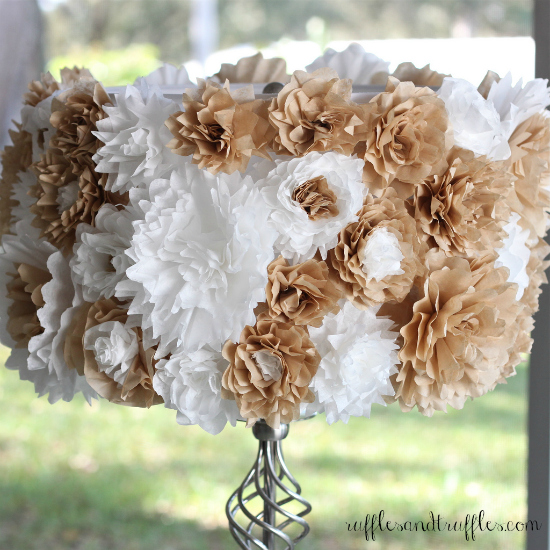
I used the technique I’m about to describe for about 2/3 of the flowers on the lampshade. This tutorial is simple to follow, only requires a few simple materials, and allows for many variations to achieve different looks!

Let’s get started, shall we? This is what you will need:
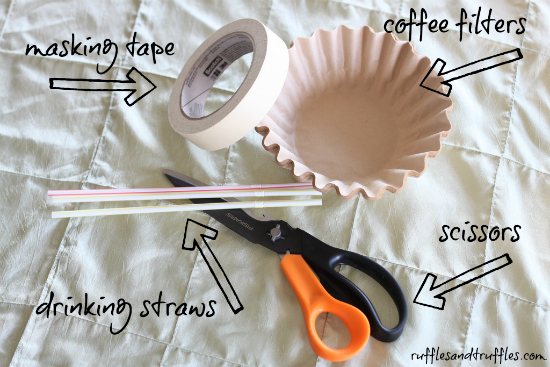
Materials: masking tape, coffee filters, scissors, plastic drinking straws
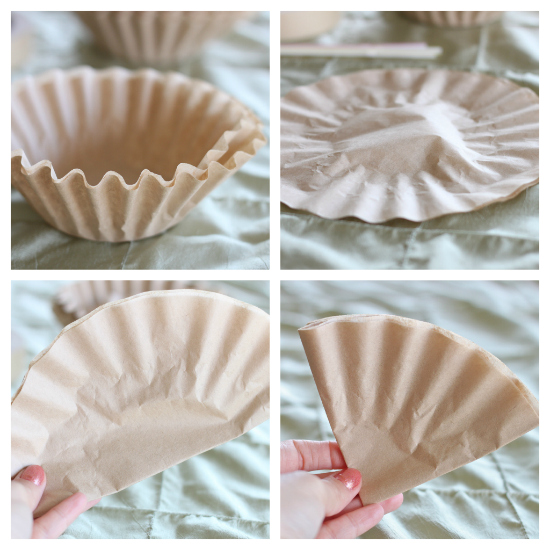
1. To start, separate the number of filters you’d like to use for the flower. For this rose, I used 3 filters, but I have used anywhere between 2 and 6 to create different sizes of roses. 3 coffee filters achieves a pretty nice sized rose, in my opinion!
2. Gently smooth/flatten out the filters so they are easy to fold.
3. Next, while holding the filters together in a stack, fold them in half, then again into quarters.
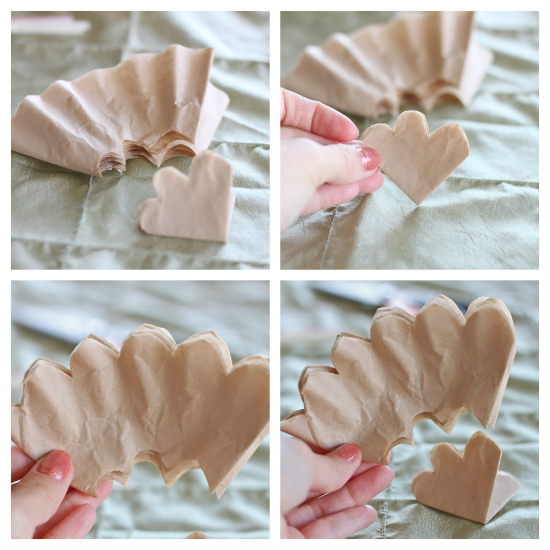
4. Use a pair of scissors to cut a scallop (or, alternately, a pointed shape) shape through the bottom third of the filters. Set the bottom third (the bottom corner) aside. Then, cut a scallop shape (or points) across the top of the filters.
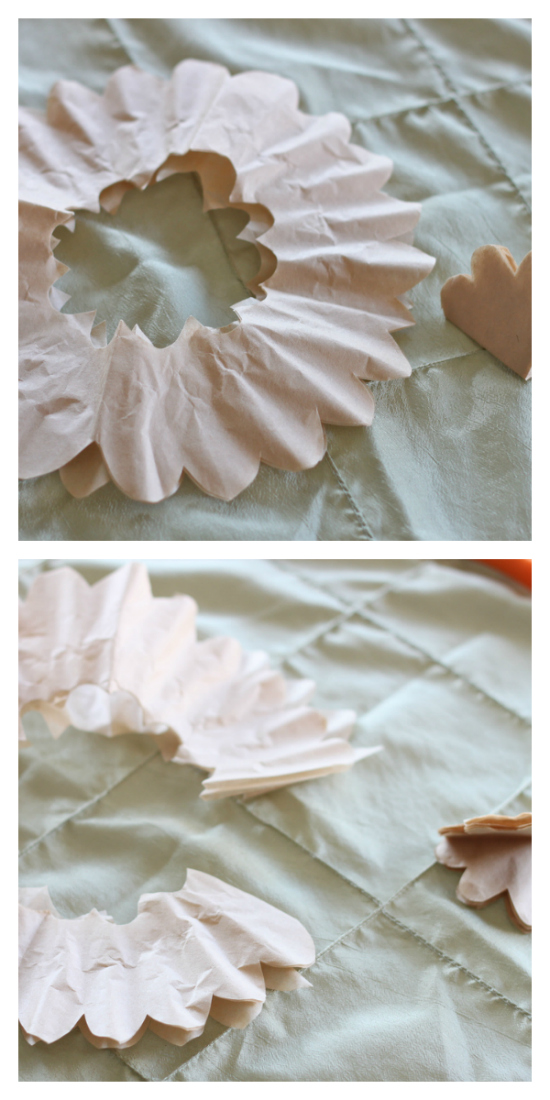
5. Unfold the cut filter pieces – you will be left with 3 donut shapes and 3 small scalloped circles. Use the scissors to cut a straight line through one end of the donut shapes.
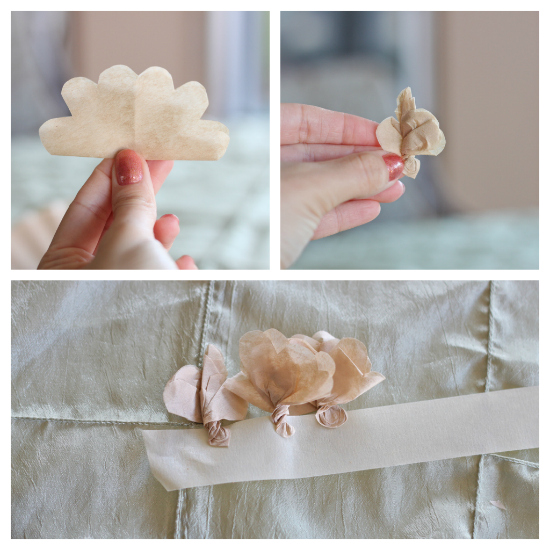
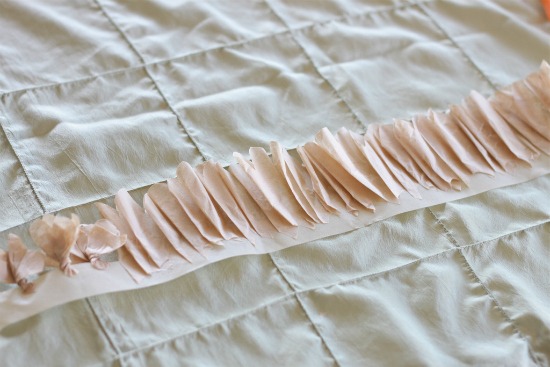
6. Cut a strip of masking tape about one foot long and set it on your working surface, sticky side up. One at a time, pinch one of the scalloped circle pieces in your fingers and twist. Place the twisted piece on the tape strip, about one inch from the end. Repeat with the other center scalloped pieces.
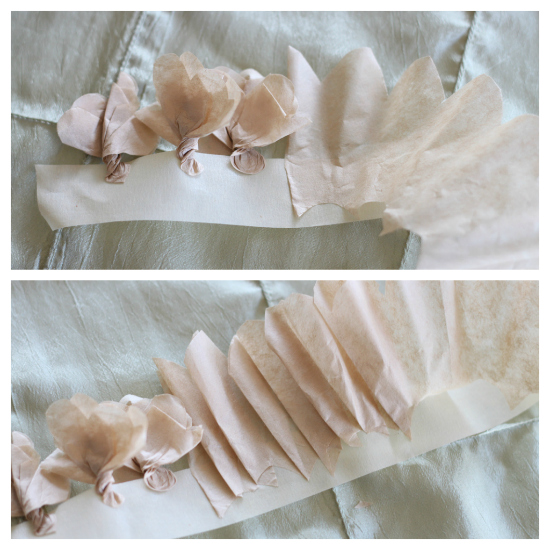
7. Once the scalloped pieces are placed on the tape, it is time for pleating of the donut pieces. Stick one end of one of the donut pieces to the tape, next to the twisted pieces already on the tape. Pleat and stick to the tape. This process does not have to be perfect – the pleats will create the ruffle effect of the petals on the flower, but nature is not perfect, so do not worry if your pleats are not even and perfect! Repeat the pleating with all three strips. If you start to run out of masking tape, simply affix an additional few inches at the end of the strip and continue pleating.
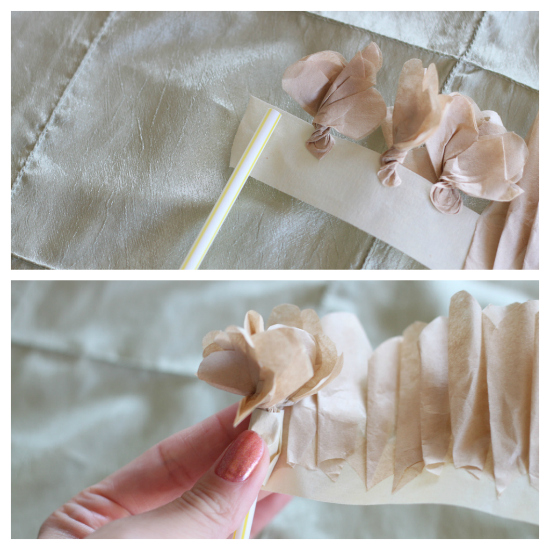
8. When the pleating is complete, affix the end of a plastic drinking straw to the end of the tape strip (next to the twisted pieces from the beginning). Gently roll and pinch the tape around the straw. You will start to see a flower shape form!
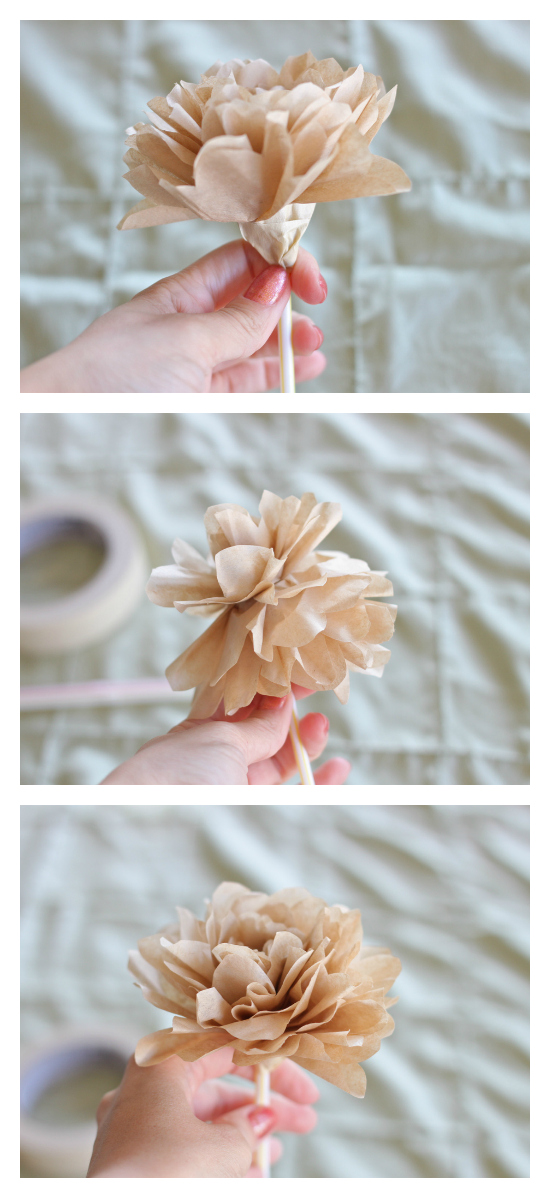
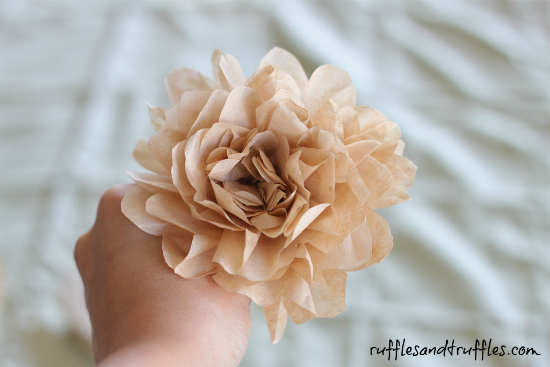
9. When you reach the end of the tape strip, press it down firmly. Then, fluff your flower. I run my fingers through the ruffles and smooth them downwards. Then, I quickly pop them back up, creating a fluffed rose flower!
10. Snip the excess amount of drinking straw from the bottom of the flower if you just want the flower bud. Alternately, if you wish to have your roses with stems, you could wrap some green floral tape around the masking tape and drinking straw to create a green stem!
As I mentioned before, you can use this method to create a number of varieties of flower shapes and sizes! I used both brown and white filters for my lampshade: I would swap the center pieces to create brown centers with white petals/white centers with brown petals. Scalloping the edges gives the flower the appearance of a rose, but by snipping points instead of scallops you can get a dahlia-like shape. Just have fun with it!
I’m not kidding when I say there are so many amazing coffee filter flower tutorials around, so make sure to check them all out to get inspired like I did! Aunt Peaches has spectacular watercolor versions (and two tone ones on Design*Sponge are a really fun variation too), Lemon Jitters created some really awesome shapes with her flowers, I love the simple shape of the ones by Orange Kitty Crafts, All Things Paper has a really funky looking flower tutorial, Brown Paper Packages and Unusually Lovely made their own peonies using Michella Marie‘s tutorial, The Pink Doormat made peonies out of cupcake liners, I love how Homemade Serenity used various petal textures on her flowers, a Weddingbee member crumpled her filters to make peonies, and Papery + Cakery shared a template to print and hand painted the edge of the filters to get stunning results. I’m sure this isn’t an exhaustive list, but it should get you started!
Have you made coffee filter flowers before? Did you find it to be an easy process?


This is INCREDIBLE Katie!!! You can make me one, I know I am not that talented 😉
I am confident that you could make them!!!! So simple, I promise! 😉
These are so cute and I love how your lampshade turned out – gorgeous!
Thanks so much! 🙂
these are super cute! and look so easy! totally trying them out when i return!
I’m impressed! This level of required skill and patience might even surpass the “baby shower diaper cake,” an equally intimidating undertaking to the non-crafty like myself!
This doesn’t require much skill, I promise! Super super easy. 🙂
incredible! These flowers are gorgeous. I had to pin it!
I’m glad you like them, Kate! I was so happy with how they turned out, and so easy to make too!
Wow, I love this! I’m keen to give it a go
These are amazing, I love them!! Can’t wait to try them out.. maybe wedding centerpieces??
Love your DIY coffee filter rose. Please share more of these artsy tips!
If you are in the Myrtle Beach area in 2012 we should have coffee or a drink to brainstorm!
I’m trying to leave a photo of the ones I did but can’t do it. Oh well, these were very fun, pretty and easy to make. I dipped mine in yellow paint and the inside little piece in red. The I did purple and pink. Thanks for sharing. I finally got the hang of it after a while.
hey! Thanks so much for this tutorial! My MIL is in the intensive care unit and can’t have any live flowers in her room, soooo I found your blog in my search for beautiful and do-able paper flower instructions so I can make her something that she can have in that dreary place! and wow, THANKS! I can’t wait to give these a try tonight and assemble a bouquet for her! I’ll deliver them tomorrow and maybe the nurses wil stop me walking in with them, bc they look so real! lol! Cheers! 🙂