It is no secret: Justin and I are big fans of Halloween. Big big fans. We make our yearly trek to Halloween Horror Nights in Orlando (by the way: loved it this year!), and I’ve always longed for a yard to decorate for the holiday. Well, this year was our very first shot at it, and I wasn’t going to miss out on the opportunity. I’ll be honest: I didn’t think Justin would go for any of this…but after he heard me giggling after seeing a picture on Pinterest of some skeletons carrying a coffin across a yard, he was hooked on the idea of creating our own scene.
We brainstormed for a bit; how many skeletons would we need to acquire? How will we pose them? How will we make them stay put in the yard? Come to find out: purchasing full size skeletons isn’t exactly a cheap feat. Plus, depending on how you would like to position the skeleton, certain joints are required. For our final product, we needed two different types of skeletons – one with arms that had rotating shoulder/arm sockets, and one without. However, we managed to score an awesome deal at Ross for our first one: $24! Good fortune was shining on us. We found our second skeleton at Target; it was the cheapest option after shopping around at various party and Halloween stores in our area. Go figure: I love you, Target.
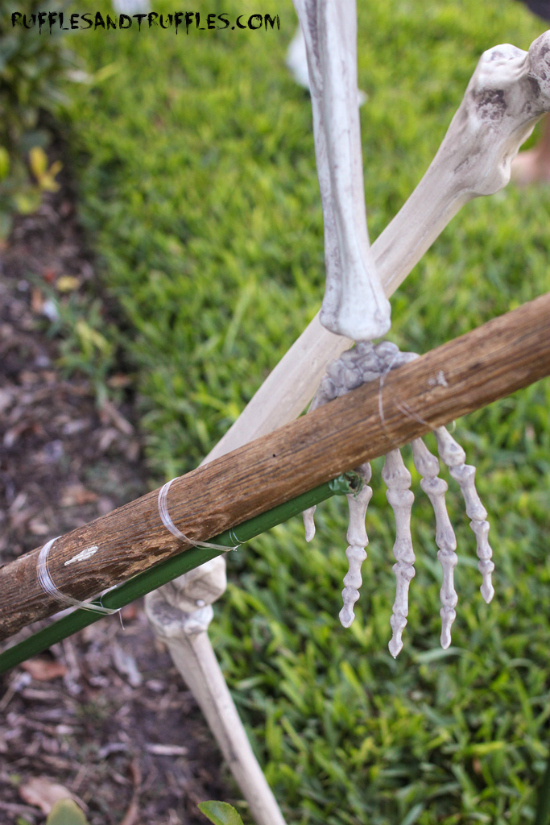
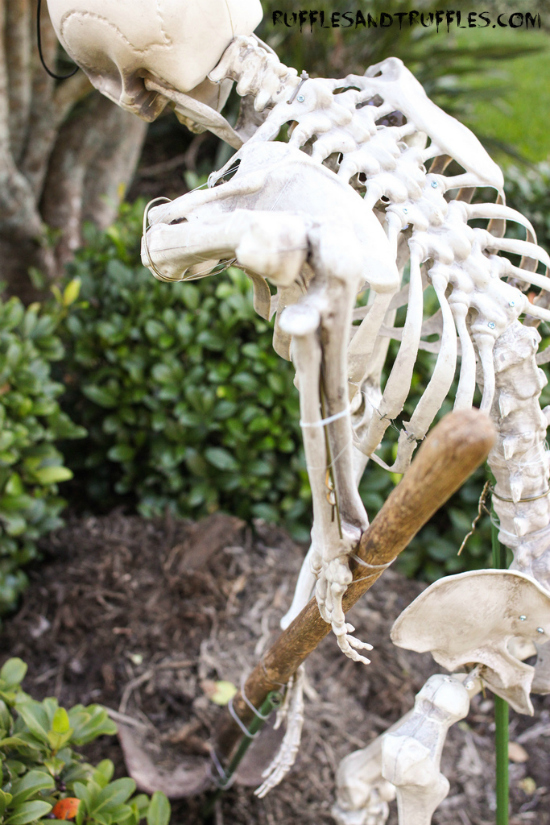
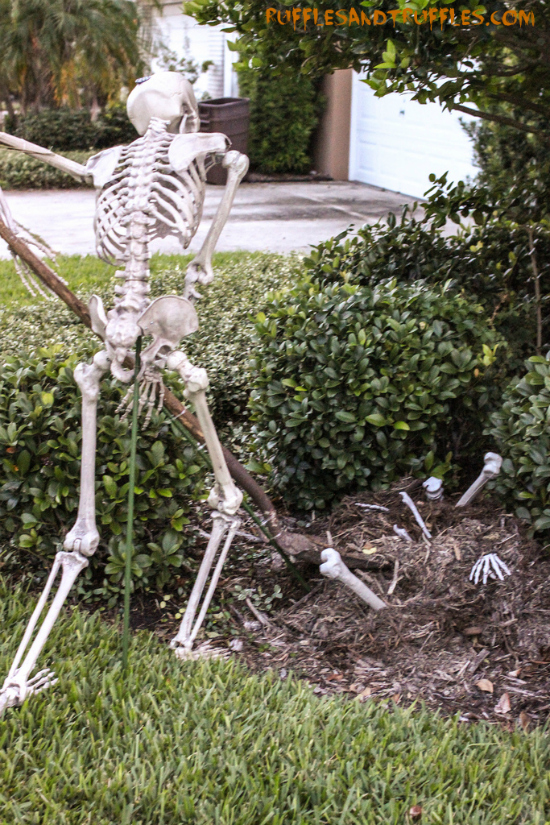
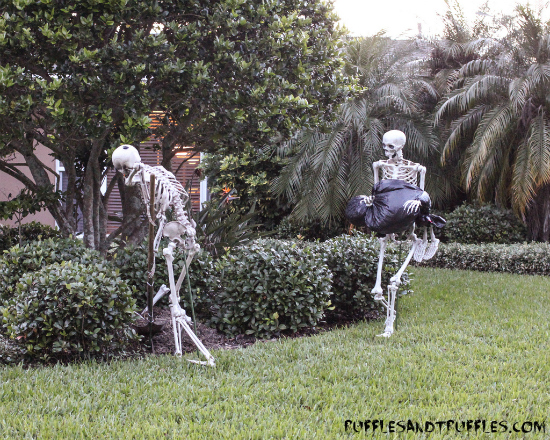
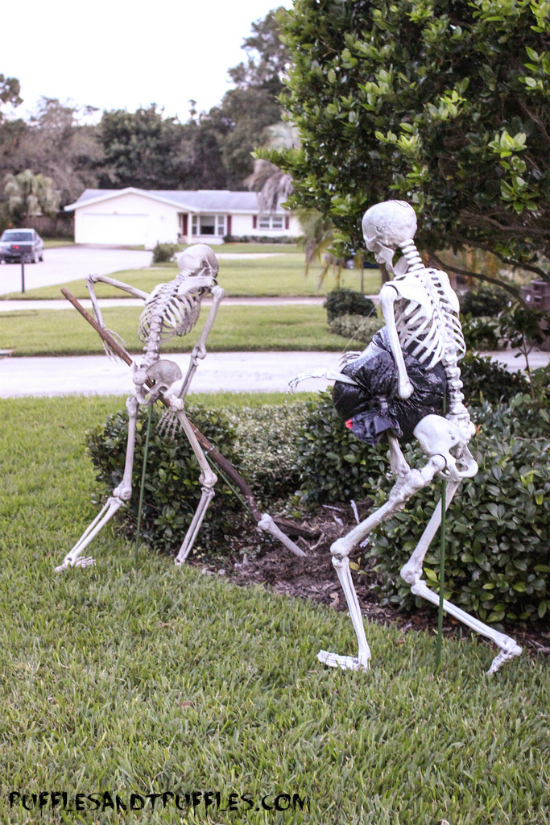
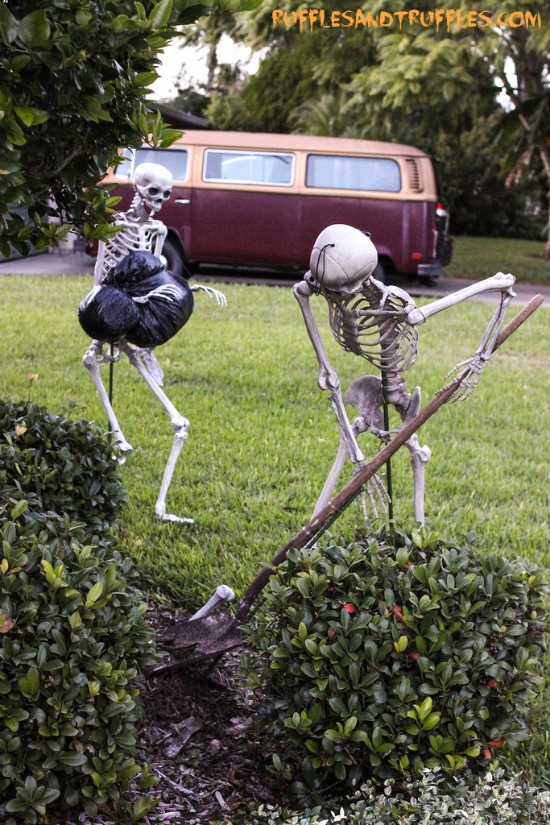
Justin and I put our heads together to come up with the skeleton configuration. We thought it would be funny for one of our skeletons to be digging a hole in our yard. We used a garden stake to help keep the shovel upright in the correct position – we left about 1.5ft of stake in front of the shovel blade and stuck it into the ground so the shovel would be able to stand up on its own (the skeleton isn’t really holding it up).
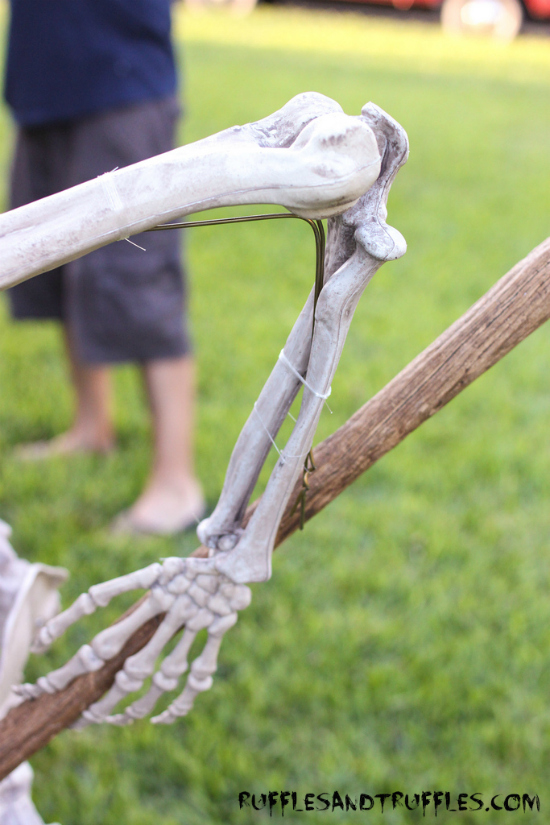
To keep the skeleton’s arms in the correct “shoveling” position, we cut pieces of some old wire clothing hangers to aid the shape, then secured them with fishing wire to the skeleton’s arms. Another garden stake was secured to the bottom half of our skeleton (ouch…sorry dude) with wire and fishing line, and we staked him into the ground/tied his hands to the shovel in the proper form.
To create the look that he was digging a hole, Justin piled some mulch up around the shovel, and we purchased a “bag of bones” from a local party store to stick in and around it for added effect.
That wasn’t enough though. Skeleton number two had to come into play. We decided it would be funny if our second skeleton was carrying a body over to his digging friend. We positioned him much in the same way we did with the first form – a garden stake on the bottom, and then we secured some fishing wire from the skeleton’s wrists to his shoulders to hold his arms in a “cradling” position.
I created the “body bag” with a black garbage bag. I stuffed it with old plastic grocery bags I have been meaning to recycle (woo! This came in handy): I created a round “head” shape at the bottom, and wrapped it off with electrical tape. Then, I stuffed more plastic grocery bags to the center to create the body shape. Before wrapping with electrical tape, we stuck two leg/foot bones (from our bag of bones we bought) in the bottom of the opening, then taped them in. The final product looks like skeleton feet are poking out of the garbage bag, which I like, but is definitely not necessary if you’re trying to recreate.
All in all, I am so incredibly pleased with how this little project turned out. Now that we have our skeletons positioned in the yard, Justin and I keep thinking about more configurations we want to use in the future. Perhaps we’ll have to add a few more skeletons to our collection in following years…who knows!
Do you like to decorate your yard for Halloween? How are you dressing it up this year?









That is fun, and I am sure the trick or treaters will love it!
I am a HUGE HUGE HUGE Halloween fan too! This is hilarious. I love it. Good work!
I LOVE your skeletons! Your neighborhood is lucky you are so ‘spirited’ !!! 🙂
Super funny! I just bought two today and haven’t figured out how I’d like to do them. So jealous you scored one for $20. Great job!!!
These are SO. AWESOME. I absolutely love them!
Oh my goodness – I LOVE LOVE LOVE this. Although we’ve known each other for over a year, you still find ways to amaze me with your creativity.
This is so cool/scary/fun !!!!
Love! My hubby and I bought these same skeletons tonight but didn’t get the great deal you nabbed! They were originally $49.99 each and I had a 20% off coupon which they let us use in two transactions so we saved a little more. Since we got married just a few weeks ago we are dressing them up as a bride and groom in in our grave yard. We named them Edna and Fred (Fred after my invisible roommate in the basement of my moms 112 year old house when I lived at home, LOL). On the way home though, we put them in the backseat and buckled them up. We sure got some strange looks and a few laughs 🙂 I saw the same pic on Pinterest which inspired me to acquire my own bony friends. Maybe as our family grows we will add some skelebabies! 🙂 Happy Halloween!
Hey GREAT idea! I really like that they are doing the “daily chores” kind of theme!!! Looks great and nice imagination with the covering of the bones and trashing of the bag!! Cool and glad I got linked in my search! I will be using your clothes hanger “pose” technique in my child skeletons helping each other climb.
Way, way cool!!!! Both hubby and I enjoyed looking at the scene you and Justin created. No decorating outside for Halloween but in a few months, we’ll deck out the house for Christmas 🙂
Ha, ha, ha! This is SO cool!!
Thanks so much Nesa! 🙂
This is too cute!! Our Master Gardeners would love this! Happy Halloween 2014!
What a great idea! I LOVE it! Thanks so much for an excellent post and great photos showing how you pulled it off. Job well done! I would leave them up year round and “dress” them for the holidays!
I’m a huge huge HUGE Halloween fan too. Ok my family thinks I’m obsessed. Anyway I absolutely LOVE this!!! I’m gonna add full size skeletons to our yard this year. I’ve got 2 (possibly 3 if my coworker brings in her skeleton) & may get more (if cheap enough) & just have a bunch of skeletons in my graveyard for Halloween. My hubby gets into it too & he can get pretty warped ideas too. LOL. Thanks for sharing!!!! 🙂
I love your skeletons! Awesome! I saw where a lady dipped her hand in some kind of plaster (it was in a foreign language so not sure what it was) and made a mold of her hand and put them around her yard like they were digging out she also broke some fingers off and put them around in places of course with blood on them. You could have them in the in the candy bowl no one take the candy it would be all yours no problem. You could also do your feet.
Oh wow – that sounds really cool! I love that idea as well!
[…] this is actually a pretty spooky image. That’s actually the cool thing about it. Check out helpfulhomemade to find out how to make your DIY skeleton lawn decor look […]
[…] to know how you can pose skeletons into these scenes? Go try the DIY skeleton garden decor from ‘Helpful Homemade‘. Love this […]
[…] to know how to pose skeletons into these scenes? Go check out the DIY skeleton lawn decor from ‘Helpful Homemade‘. Love this […]
[…] to know how you can pose skeletons into these scenes? Go try the DIY skeleton garden decor from ‘Helpful Homemade‘. Love this […]