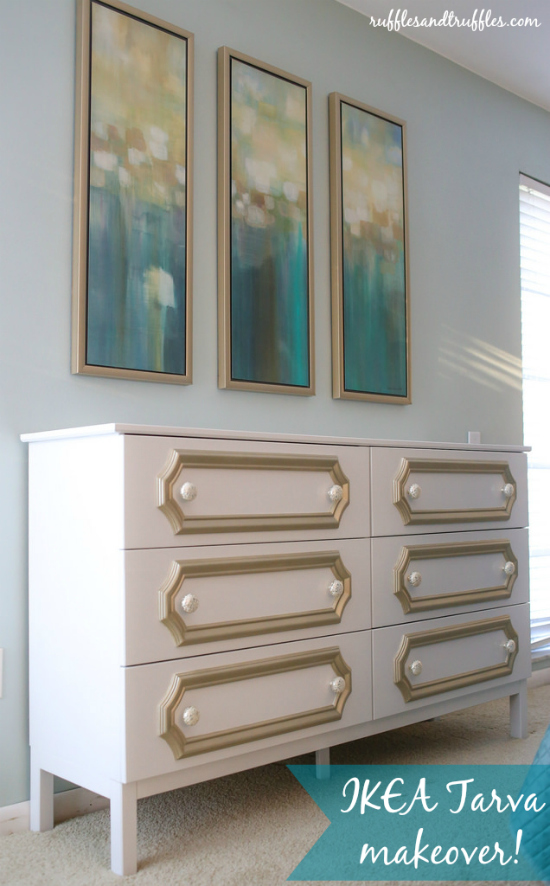
Today is the day – I teased our newest DIY project for our bedroom on Instagram a little over a week ago. Today – the tutorial (and pictures!) for the DIY IKEA Tarva makeover!
We have been on a roll with putting together our bedroom decor, and one of the big transitions is going from our black furniture to white. We recently added a small white table in the corner of our bedroom (thanks again, Marshalls!), and the next step was to replace our dressers and night stands (just wait: a tutorial for those will be coming up soon as well – they turned out pretty lovely, if I do say so myself).
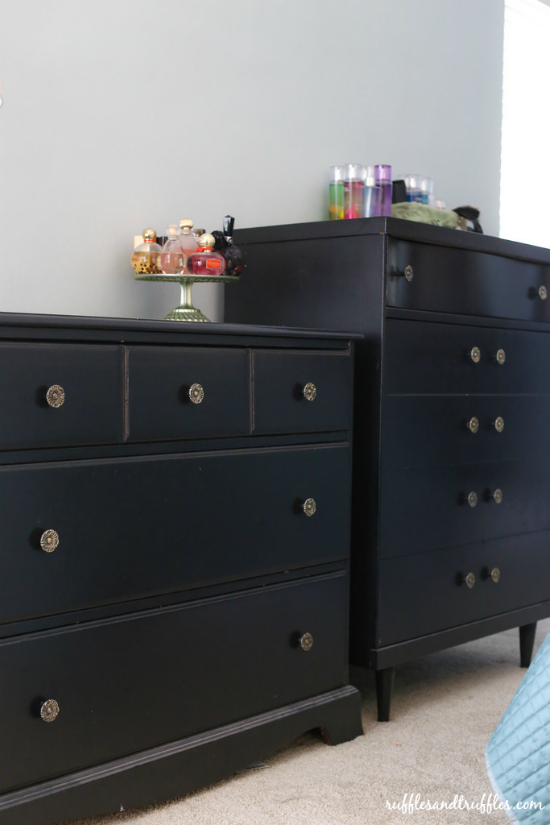
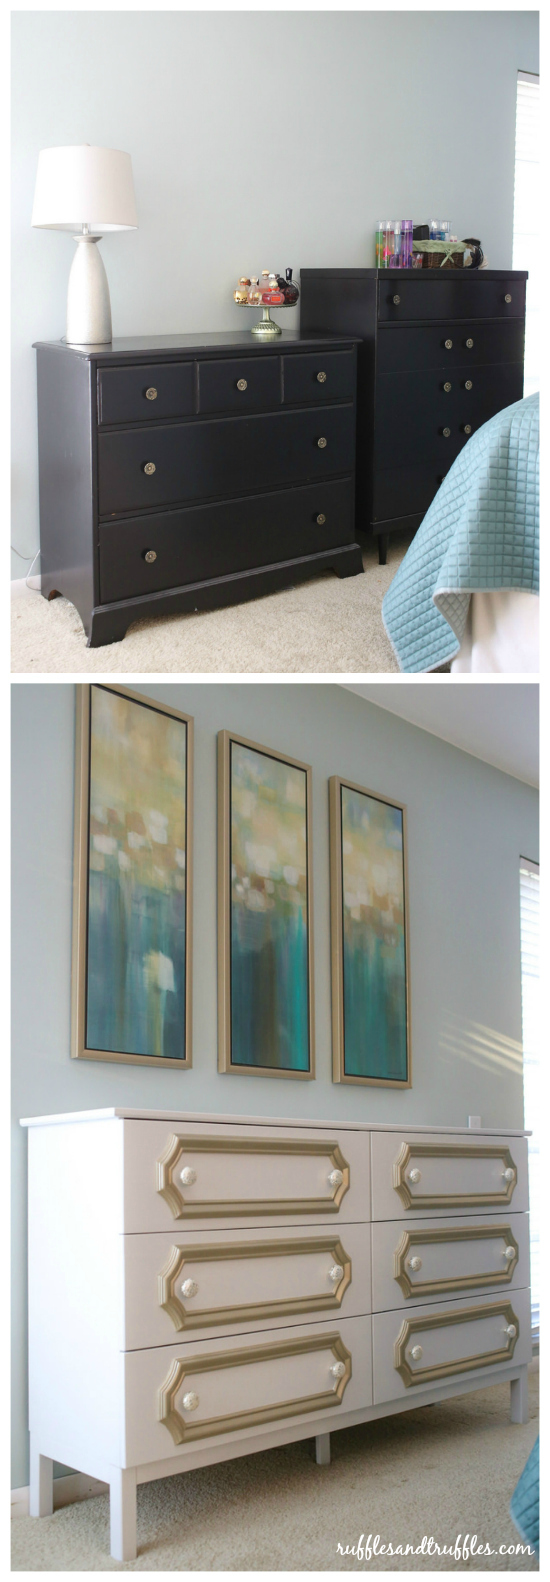
It’s funny: looking at the photos of our old dressers now make me wonder how I lived with them for so long. Again, they were pieces I purchased right after college from someone on Craigslist. They are solid wood and sturdy, but it is safe to say we’d outgrown them. I shopped around at various stores to find a replacement I enjoyed, but none were to be found. I then got the crazy idea that we should just DIY a dresser to ensure we had the perfect look. I’d seen one in particular I loved over on Centsational Girl; oh boy, was it gorgeous…and I decided to use it as a bit of inspiration.
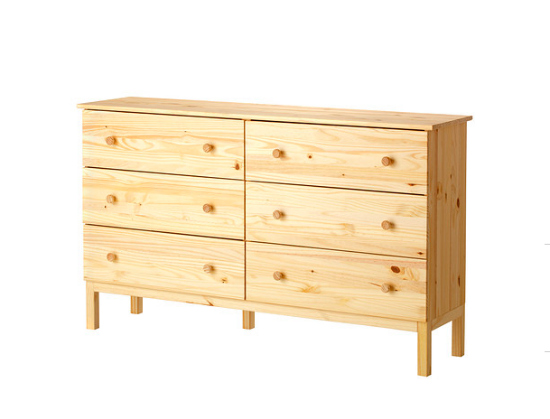
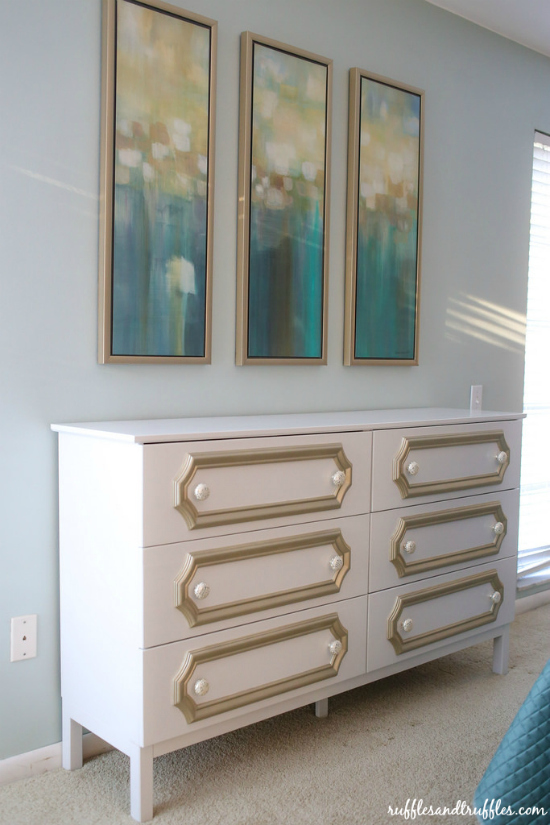
First: we acquired the Tarva dresser from IKEA. It was the perfect size for our space; the space for a dresser in our room needs to be on the wall with the bed across from it. The bigger the pathway between the two, the better. Our previous dressers were deeper than the Tarva, so I was excited about the prospect of more walking space. The Tarva was also a great option: it’s affordable ($149), made of solid wood, and it comes to you unfinished. It was the perfect blank canvas for us.
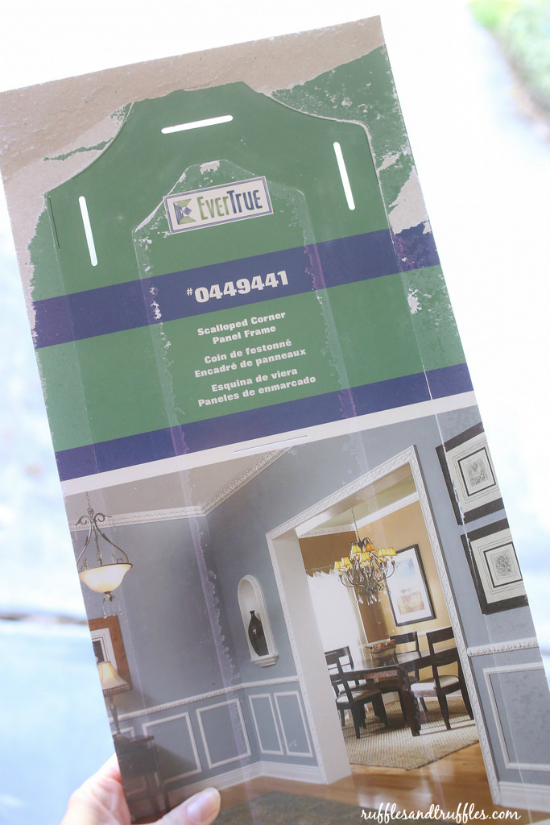
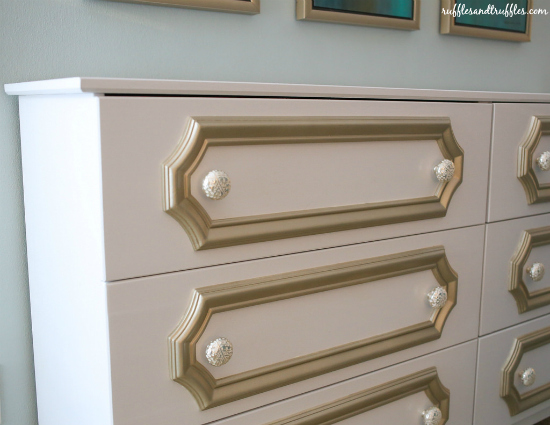
The next step was to decide how to make it look beautiful. I liked the idea of making some sort of frame shape on the face of the drawers, but wasn’t sure how I would achieve it. As Justin and I walked through Lowe’s to ponder options, I happened to stumble upon these interior panel mouldings by EverTrue. Yes, they are technically for walls, but they seemed like the perfect size. And after taking a set of 6 home with me (at $9.97 a piece), it became clear they were a match made in heaven for the drawer faces. I could not have been luckier.
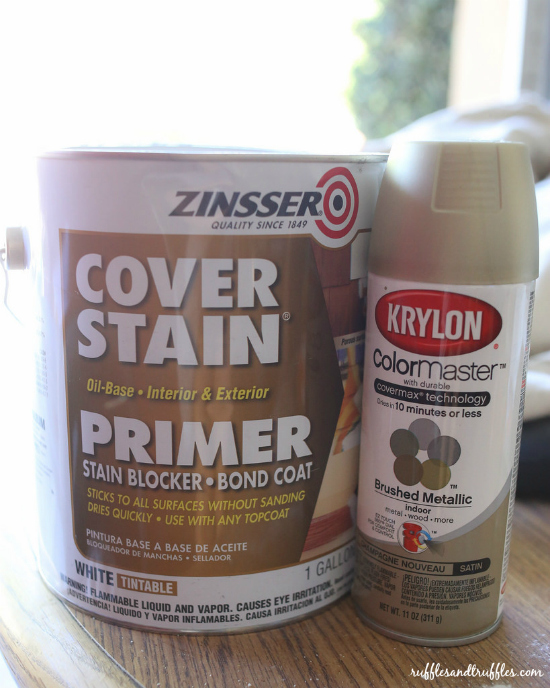
For the color scheme, I wanted to go relatively simple: white with champagne accents. For the white, we applied Zinsser Cover Stain Primer. Then, we painted two coats of Rust-Oleum Professional High Performance Enamel in Gloss White. For the champagne paint on the panels, we picked up a bottle of Krylon’s Color Master in Champagne brushed metallic ($7.99 at JoAnn Fabrics – with an additional 40% off if you use the weekly coupon). We painted the dresser before assembling everything.
To attach the panels to the drawer faces, we used Gorilla Glue! Justin carefully measured the placement on one of the drawers, then used an old cardboard box to cut a “stencil” template to ensure each panel was placed in the same spot on all 6 drawers. The process made us sweat a little bit, knowing if we shifted one of the pieces slightly, we could mess the entire dresser up…but it worked out in the end! We stacked heavy books on top of the drawers and stacked each drawer face on top of each other as we went along. The Gorilla Glue worked out SO well – the panels are firmly in place, and I don’t think we’ll be able to remove them: they’re on there for good!
The final piece? The drawer pulls. Justin can attest to how difficult this selection process was. For some reason, the rest of the details of the dresser were easy to decide on, but the pulls were my biggest challenge. I searched many places until I realized I was most drawn to the pulls offered at Anthropologie. They have such a fun selection of unique drawer pulls, and I fell in love with these feather imprint ones. I had to have them, so I bit the bullet and picked up 12. They ended up being the most expensive portion of my dresser ($14 a piece), but I found them to be well worth it for the overall look of the dresser. You can definitely find great looking drawer pulls at a lower price, but this was just one of those decisions I wanted to splurge on a bit.
Oh, how excited I was to finally put these prints on the wall?!?! I have had them for a few months now, but had wanted to wait until we had a new dresser before placing them on the wall. They had been leaning against a wall in our bedroom for far too long. I can’t believe how perfectly they blended with the dresser. Oh Home Goods, you spoil me with your awesome finds…
And can we talk about the before and after a bit? Honestly, how was I living with the old dressers in the room? This makeover was one I desperately needed.
Now that the dresser is in place, the final piece of the puzzle will be repainting our headboard. I have a huge black headboard on our bed – it just needs a nice coat of white paint to brighten up the room!
Have you made over a piece of IKEA furniture?











Beautiful piece! I noticed that you said you painted all the pieces prior to assembly. In most of the other TARVA tutorials I’ve seen they assembled it first and then painted, but my initial thought was to paint first like you. Do you think painting and then assembling was easier?
Emily – I think it would have been much harder to paint it after assembling! We were able to do a much better job when we painted it before assembly. I’m sure you could do it the other way, but it made sense for us!