

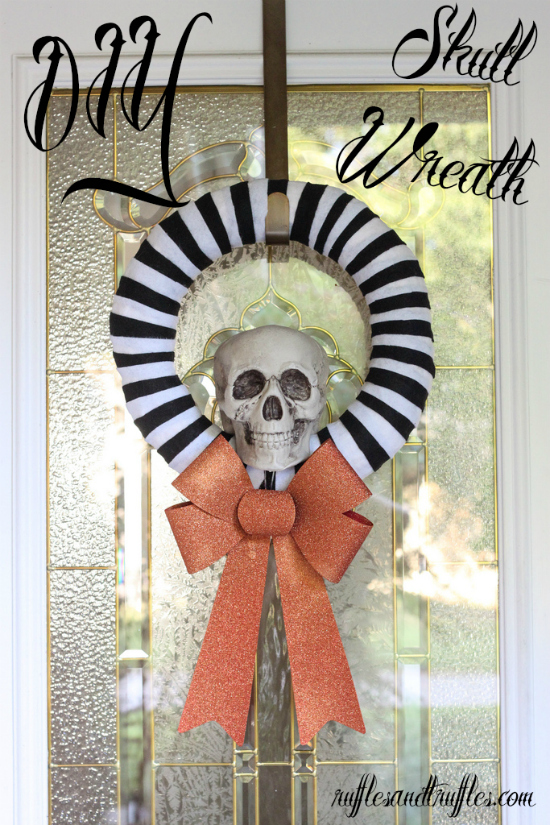
Justin and I decided we weren’t done with our Halloween decorating with just the skeletons posed in our yard. I thought it would only make sense to decorate our front door as well…with a Halloween wreath!
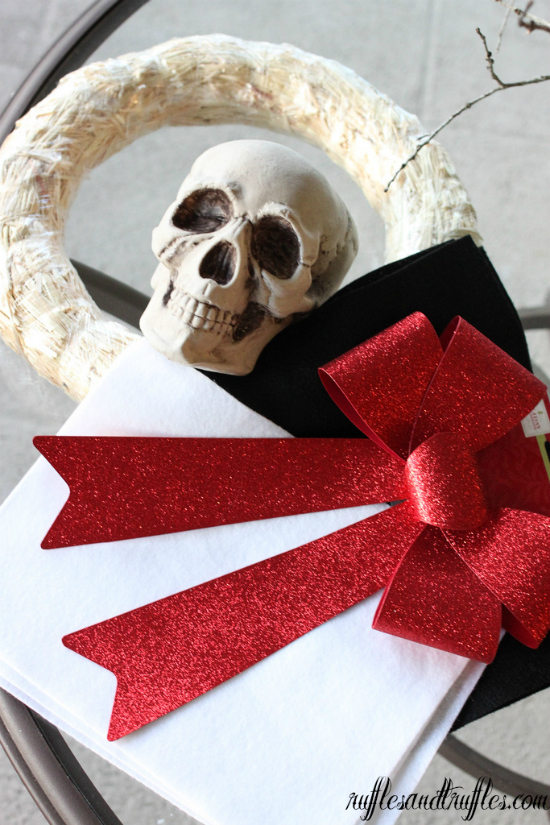
I have seen so many great Halloween wreath ideas over the years and I was excited to create one for our home. I really wanted to create a wreath out of skeleton bones like the one on Ready, Set, Craft! However, when I preemptively calculated the cost of a few bags of bones from the Halloween party store I decided to go with a slightly more affordable option. Perhaps I’ll accumulate more bags of bones over the years and can create a wreath then!
Anyway, I spotted my stripey inspiration over on Better Homes and Gardens. They have a short tutorial for making a felt striped wreath with a printed skull and an upholstery fabric ribbon. I took that idea, visited my craft store, and made a few changes to come up with our finished product.
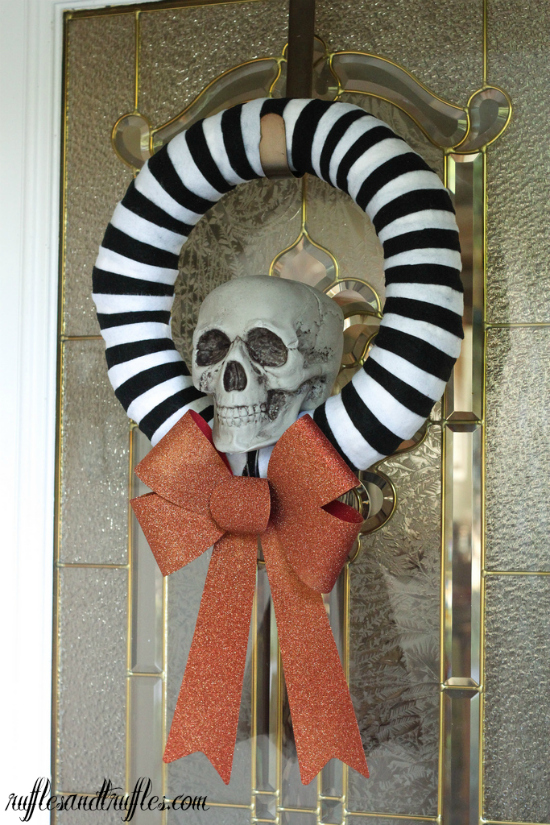
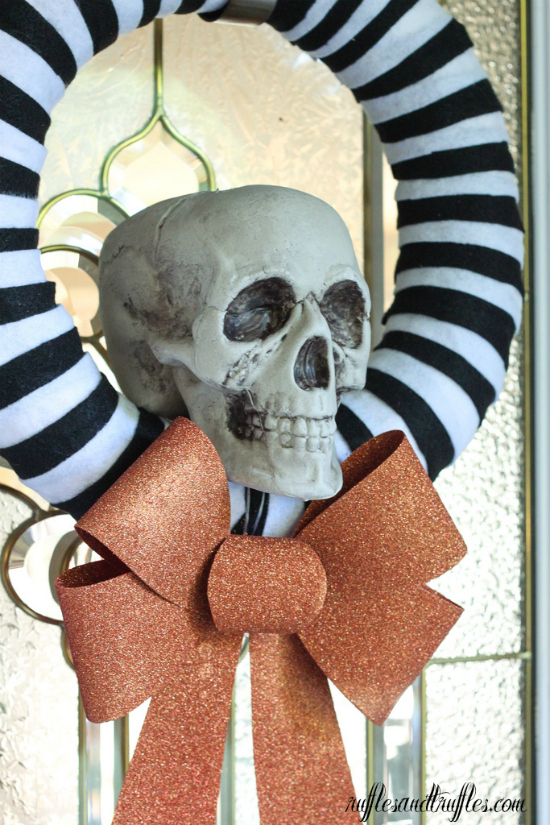
In place of the printed skull, I thought it would be nice to add a three dimensional one. And, instead of using upholstery fabric for the bow, I spotted the holiday bows at my craft store. A red glitter bow stuck out to me as the perfect size, and a little bit of orange glitter spray paint was all I needed (and saved me the frustration of creating a large, poofy bow). All in all, I think it turned out very well – it makes a nice statement as you walk up to the front of our home this Halloween season! I’ve included the materials and instructions if you’d like to make one yourself –
Materials needed:
Wreath form (I used a hay wreath, but you could use a styrofoam one too)
Plastic skull
4 sheets each: black felt and white felt (about 8.5″ x 11″)
Hot glue gun and glue sticks
1 red glitter holiday bow
1 can orange glitter spray paint
Clear twist ties (or wire)
Instructions:
1. Cut felt into strips about 1-2 inches wide (I cut so they were 8″ long). Heat your glue gun, then apply a line down the center to one side of a felt strip. Wrap the felt strip around the wreath, attaching the seams on the back of the wreath. Repeat with the alternate color of felt, layering it slightly on top of the first piece. Continue alternating felt strip colors until the entire wreath is covered in a stripe pattern. Don’t worry about the stripes being completely uniform – it adds to the character of the finished product!

2. Place the holiday bow on newspaper outdoors in a well ventilated space. Spray with the orange glitter spray until the bow is completely covered (it took about half of the can for me). Allow paint to dry before attaching to wreath.
3. To attach the skull to the wreath, pierce 4 holes: two in the back of the bottom of the skull, and two in the front of the bottom of the skull. Loop clear twist ties or wire through the holes and create a loop (one loop in the front holes and one in the back). Then, place the skull on the interior of the wreath and string an additional length of twist tie or wire around from the front to the back of the skull, and around the underside of the wreath to connect the loops. Twist to secure the skull in place.
4. When the glitter paint has fully dried, you can attach the bow. The bow should come with a twist tie on the back side – string it through the wire that is securing the skull to the wreath and twist it tight to attach the bow underneath the skull.
5. Use a wreath hanger to attach your creation to the door – Happy Halloween!
Have you made a Halloween wreath for your door this year?


You’ve impressed me once again friend!!
Looks awesome!
So creative! Pinning for later. 🙂