Can you believe Easter is almost upon us? 2013 is seriously flying by at breakneck speed.
Today, the gang at Sunday Supper is celebrating the season with recipes for Passover and Easter. I decided to contribute with a little recipe that is fun for the entire family to get involved with. My mother in law actually told me about the recipe, and since I had the components already in my kitchen, it was a no-brainer!
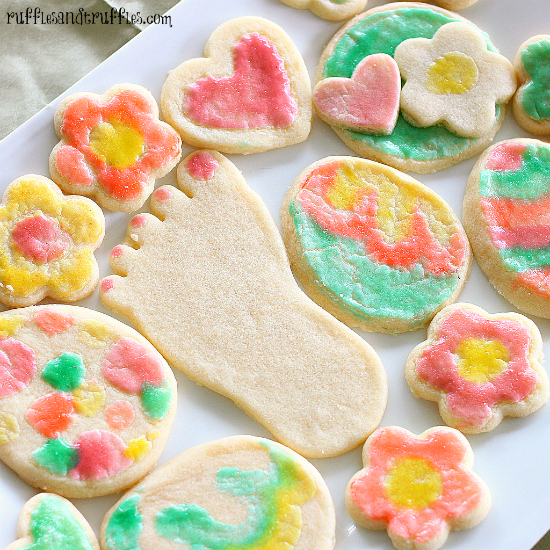
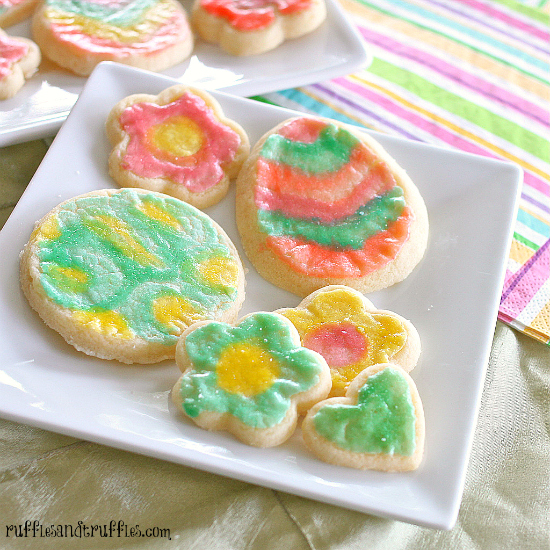
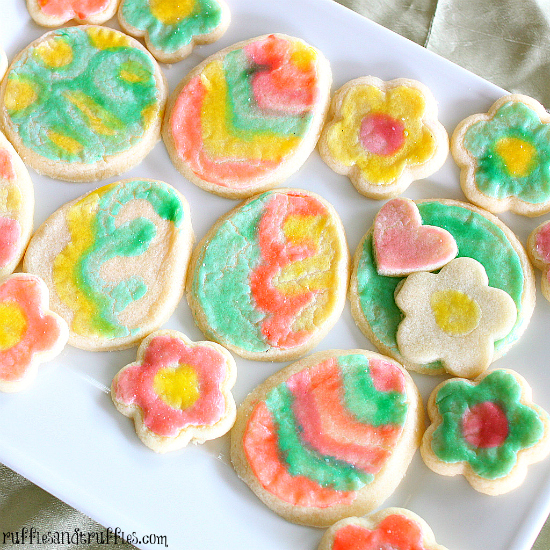
These painted sugar cookies are a fun DIY project, and an alternative (or added) project to dying Easter eggs. All they take are a few simple ingredients, and you’re ready to get the creativity flowing!
First: sugar cookie dough. You can make your own cutout cookie dough, or if you’re like me and feel like cheating you can always buy one of the bagged mixes that you simply add an egg and butter to. It’s up to you. Today, I took a shortcut, but added a few drops of almond extract for extra flavor in the dough. No shame.
Roll out the sugar cookie dough and cut it into fun shapes. If you don’t happen to have an egg shaped cutter and are looking to make egg shapes, you can always use a circle cutter (or…a drinking glass rim) and gently mold the sides to an egg shape. That’s what I did with the egg shaped cookies in this batch, and although they weren’t 100% uniform in shape, I think they turned out pretty well.
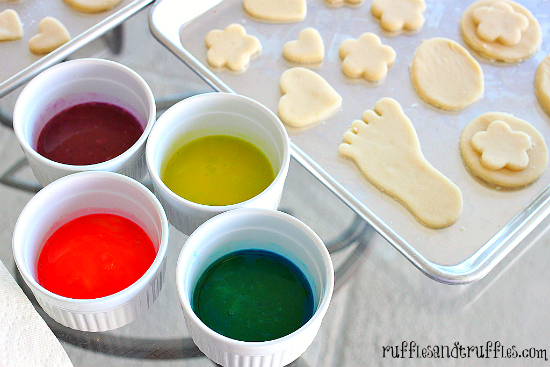
The fun part is the painting, of course! Make sure to thoroughly wash any paintbrushes before using them on the cookies…or simply purchase a brand new pack. I found a pack of 24 brushes at the dollar store and those worked just fine for me! Have fun creating various paint colors with food dye. I am particularly fond of the neon food coloring pack I bought – the colors turn out really vibrant and fun. The egg yolk paint gives the cookies a nice sheen – so pretty! And another great thing is that one color “batch” of paint goes a really long way. You only need to make one “batch” per color you want to use, unless you’re making mass quantities!
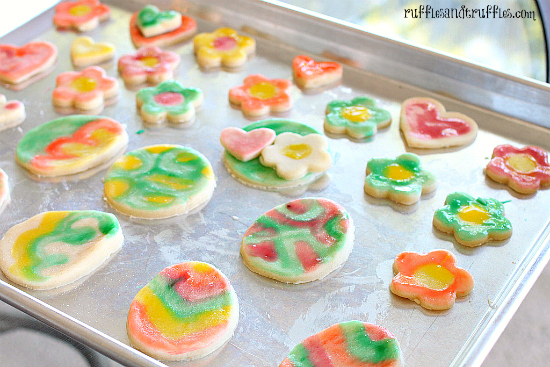
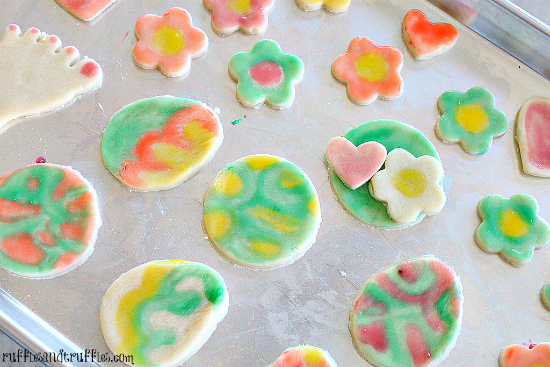
Once the cookies are painted and ready to go in the oven, wait with anticipation to see the final product! I also made these painted cookies with my Sweet Treats class, and our 3, 4, and 5 year olds really had fun seeing their beautiful creations. I actually think some of theirs turned out better than this batch that I made did! I don’t claim to have amazing skills at cookie painting. Perhaps I need more practice…
Do you have any family traditions you take part in around Easter time? Dying Easter eggs? Making cookies? Having a family meal?
Sugar Cookie “Paint”
- (For a single paint color)
- 1 egg yolk
- ¼ teaspoon water
- 1 drop food coloring (more if needed for desired color)
- Preheat oven according to sugar cookie dough baking instructions (I heated my oven to 360 degrees F).
- Prepare sugar cookie dough, roll to about ¼ inch thick on a floured surface, and cut with cookie cutters. Place cut cookies on a baking sheet.
- To prepare the paint, separate one egg yolk into a small dish (I use ramekins). Add the water and a drop of food coloring of your choice. Stir thoroughly to incorporate, and add extra food coloring if needed to reach desired color. Repeat this process as needed until you have a color palette of egg yolk paint for the cookies.
- Use clean paintbrushes to paint the top of the cut sugar cookies. Keep each paintbrush in one paint color's ramekin to not dilute/mix the colors.
- Bake the cookies for 5-7 minutes. Keep an eye on them as they cook - when the cookies bake for too long or on heat too high, the paint will start to crack. Remove cookies from the oven and allow them to rest on the cookie sheet for 3-4 minutes before removing to a cooling rack.
- Allow cookies to fully cool/dry before serving. Enjoy your creations!
~~~~~
Make sure you check out the other amazing offering from the Sunday Supper crew today –
Easter
- How To Color Easter Eggs Naturally from Shockingly Delicious
Breakfast, Breads, and Buns
- Bunny Rabbit Bread from In The Kitchen With Audrey and Maurene
- Easter Brunch Creme Brulee Baked Oatmeal from In The Kitchen With KP
- Fresh Blueberries Hot Cross Buns from My Cute Bride
- Jamaican Easter Spice Bun from The Lovely Pantry
- Paska – Ukranian Easter Bread from Cupcakes and Kale Chips
- Portuguese Easter Bread | Folar de Pascoa from Family Foodie
- Resurrection Rolls from Neighbor Food
Appetizers and Sides
- Asparagus, Brie & Ham Crostini from Daily Dish Recipes
- French Gratin Potatoes (Dauphinoise) from Simply Gourmet
- Lemon Glazed Carrots from Curious Cuisiniere
- Not So Deviled Eggs from Country Girl in the Village
- Orange Raisin Couscous from Vintage Kitchen Notes
- Potato and Leek Gratin from Webicurean
- Spinach Spaetzle (Spinat Spaetzle) from The Not So Cheesy Kitchen
Main Dishes
- Roast Leg of Lamb with Garlic and Rosemary from Small Wallet Big Appetite
- Slow Cooker Honey Glazed Ham from The Meltaways
- Sicilian “Enchiladas” from The Cooking Actress
Dessert
- Alebele – Goan Coconut filled Pancake from Masala Herb
- Bunny-Approved Baked Easter Doughnuts from The Weekend Gourmet
- Carrot Cake Cheesecake from Chocolate Moosey
- Carrots in Dirt from The Urban Mrs
- Coconut and M&M’s Cookie from Peanut Butter and Peppers
- Coconut Cake with Coconut Buttercream from Juanita’s Cocina
- Coconut Cupcakes from Magnolia Days
- Cream Cheese Candies from Cravings of a Lunatic
- Easter Egg Cookies from That Skinny Chick Can Bake
- Easter Simnel Cake from Happy Baking Days
- Exotic Walnut Cookies from What Smells So Good?
- Honey Panna Cotta with Grand Marnier Mixed Berries from Gourmet Drizzles
- Japanese Easter Petit Fours and Flowers from Ninja Baking
- Nutella Easter Egg Candy from The Messy Baker
- Old-Fashioned Peanut Rolled Eggs from Cindy’s Recipes and Writings
- Painted Sugar Cookies from Ruffles and Truffles
- Strawberry Bundt Cake from Basic N Delicious
Passover
- Homemade Matzo from The Foodie Army Wife
- Mock Gefilte Fish from Fast Food to Fresh Food
Dessert
- Apple and Cranberry Charoset from The Little Ferraro Kitchen
- Flourless Chocolate Torte from Girl in the Little Red Kitchen
- Moroccan Haroset from MarocMama
- Pavlova with Red Berries, Lime and Hibiscus from YinMom YangMom
Wine Pairing Recommendations for #SundaySupper Religious Feasts from ENOFYLZ Wine Blog







This is a very cool idea. I can imagine kids having a lot of fun with this!
Okay, the foot with the painted toenails has me giggling! Love these!
I didn’t realize at the time that the foot would be such a hit! 😉 I have a hand cookie cutter too, I should have done painted fingernails on that!
Such pretty cookies! I’m digging that there isn’t any dealing with frosting or icing. Fun too.
I really like that aspect as well. I always make such a mess with frosting, but this “paint” is relatively non-messy, as long as you can keep it off your clothes!
How fun are these?! I love the foot with its painted toenails. lol
Thanks, Shannon! I found that foot cookie cutter in my collection and was wondering what to do with it – perfect for this project!
So cute Katie. saeems everyone loves the foot cookie too!:)
Who knew a foot cookie cutter would be such a hit?!?! 😉
I remember doing this at school! Its great with kids
Definitely! I was teaching a class of 3, 4, and 5 year olds and they were really creative with all of their painted cookies. They were so proud of them!
Cute idea especially to get the kids involved in the the kitchen.
Thanks! They definitely get into the entire process, from overseeing the making of the paint colors (and you can also add in a little color mixing lesson “what color does green and yellow make, etc…”) to the painting itself! And then of course, eating the cookies…
Yup… keep giggling looking at the foot too 😉 Such a fun idea, thanks for sharing!!!
I am so glad the foot…simplest of the cookies…was such a star! 🙂 Easy peasy.
These cookies are so, so super cute!!! Love them and I am sure my girlies will love to paint cookies as well. It looks like a perfect project for spring break 🙂
I think so too! You could definitely keep them busy for a long time with all the painting. It took me quite a while to do two trays of cookies myself…
Such a fun Easter tradition!
Such a fun idea! My kids would have loved making these when they were little…and I know they’d enjoy eating them now 🙂
Is it wrong that the foot with the painted toe nails is my favorite? After all, we live in Florida and our toes must look pretty!
Not at all! 🙂 I am cracking up because I never knew what to do with the darn foot cookie cutter…and painting on toenails seemed perfect for this little project so I made one cookie that way. I think they might just be perfect for the summer…I actually have a hand shaped cutter as well…could give it a manicure!
This would be so much more fun than decorating eggs! I can’t wait until I can do this with my girls! I love your painted toe nails by the way! This had me laughing so hard haha! I love it!
I haven’t dyed eggs in a few years now, but I was thinking to myself that painting the cookies was more fun…and I like to eat the final product more than a hard boiled egg!
What a fun idea! I love that these are ‘painted’ rather than frosted to get the color.
Definitely a lot less mess than dealing with frosting, I think!
Like dressing up in our Sunday best, you’ve presented perfection for the dessert table, Katie.
Bless you for the joy your brought to the little ones in making your painted sugar cookies =)
Thanks so much for the kind words! 🙂
Omg, those cookies are too cute for words! How fun! Great idea, thanks for sharing!
Thanks for the kind words!!! 🙂
Love the idea of painting them instead of dealing with all of the frosting! It’s much easier (for me at least) to get detailed work with a paintbrush than a piping bag lol
I definitely agree with you there! My frosting skills are definitely not stupendous…unless you’re going for “rustic?” Yeah, that’s what I’ll call it…
These are totally beautiful and fun!
Thanks for the kind words, Dorothy!