

Am I addicted to making macarons now? Possibly.
These little bites of wonder are such a taste treat, and I am officially hooked on perfecting my technique and trying new flavors and fillings.
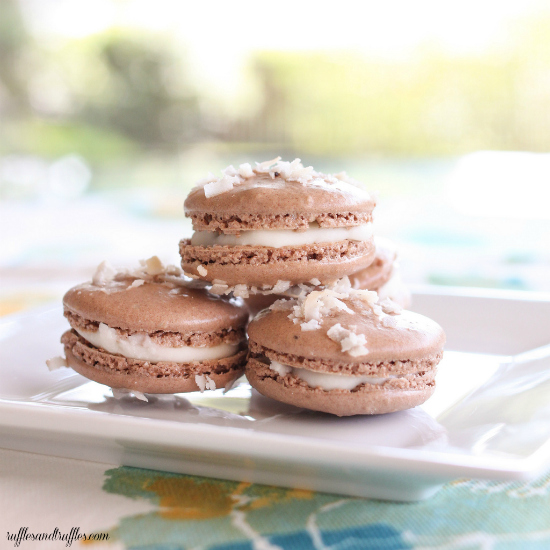
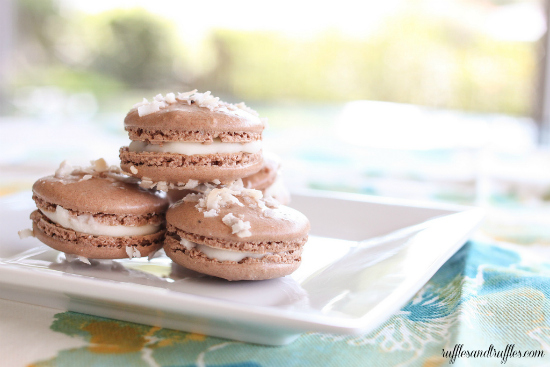
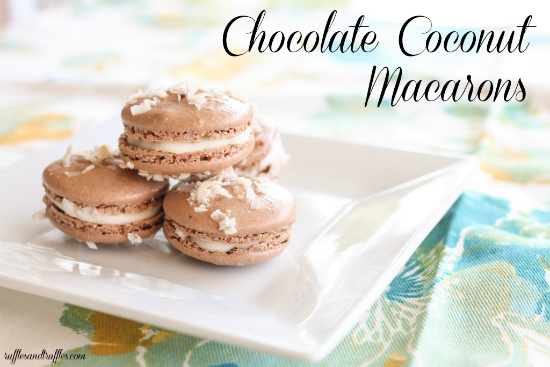
What is it about chocolate and coconut that makes such an awesome pairing? I have to admit: I only recently started enjoying coconut. I honestly did not know what I was missing out on all of these years! But now, if a sweet treat has coconut involved, I will get my hands on it.
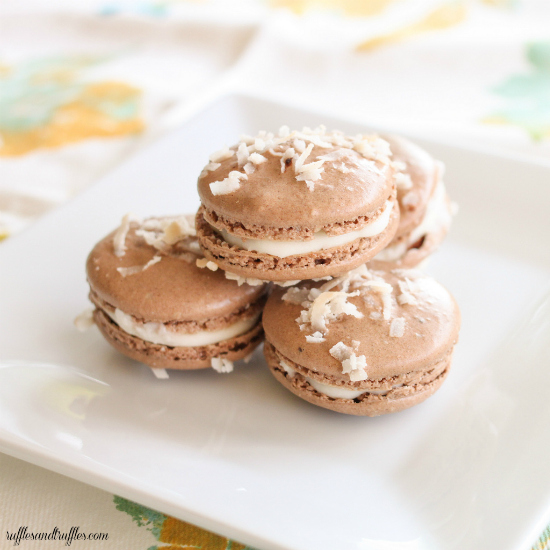
Adding the shredded coconut to the tops of these macaron shells adds a nice little touch of texture and sweetness. If you want your macarons to sit flat on a plate, only sprinkle half of your shells with coconut, so the tops are the only one with texture. Or, if you’re like me, you don’t care and want the extra coconut involved so you put it on both sides. Whatever floats your boat.
Do you have any favorite flavor combos with coconut?
- For the macarons:
- ¾ cup almond meal/flour
- 1 cup confectioner’s sugar
- 2 tbsp unsweetened cocoa powder
- 2 extra large egg whites, aged at least 24 hours
- ¼ cup granulated sugar
- sweetened coconut, shredded
- For the vanilla buttercream:
- ½ cup unsalted butter, softened
- 2 tsp vanilla extract
- 2 cups sifted confectioner’s sugar
- 1 tbsp milk
- Place the almond flour, confectioner’s sugar, and cocoa powder in a bowl and gently mix to combine. Set aside.
- Line 2 baking sheets with silicone mats or macaron mats.
- Place the egg whites in a large bowl and whip until they hold a soft shape. Make sure they are frothy in appearance before adding sugar. Then, gradually beat in the sugar in a steady stream and continue to whip the egg whites until they form a firm peak. Do not shut the mixer off during this process – the chance of under-whipping is greater than over-whipping.
- Using a spatula, fold the almond/sugar/cocoa mixture into the egg whites ⅓ at a time. When all the dry ingredients are thoroughly incorporated (about 30 stirs – move the bowl around in a circle as you stir), continue to fold until it forms a shiny batter with a thick, ribbon-like consistency. If you want to know if your batter is the right consistency – perform the river test! Draw your spatula through the center of your batter: it should run together slowly.
- Place half the batter into a pastry bag fitted with a ½ inch opening tip. Pipe small circles (about the size of a quarter) onto the prepared mats, leaving 2 fingers worth of space between each cookie if you are piping freehand. Repeat the process with the second half of the batter. ***Note: you use only half of the batter at a time because the heat of your hands will warm the batter as you pipe. Small batches will reduce the chance of this happening***
- When the batter is piped, it is time to SLAM! Firmly tap the baking sheets onto your work surface 2-3 times to remove air bubbles. When I say tap, I don’t mean a gentle tap – slam your sheet down with PURPOSE! Don’t be afraid. Once your pans have been slammed, sprinkle the macaron shells with shredded coconut (you must add toppings at this point; once they sit and bake, ingredients will no longer stick to the shells).
- Preheat your oven to 325° F and set your racks in the center slots – my oven has 6 shelf levels: I place my racks on the 3rd and 4th. Meanwhile, allow the macarons to stand at room temperature for about 30 minutes until a skin forms on top of the shells. When you gently touch the top of the macarons, the batter should not stick to your finger.
- Place your macaron shells on the top rack, and an additional EMPTY baking sheet on the rack below it – it will help to absorb the heat and allow the cookies to bake evenly. Bake the shells for 15 minutes, rotating the pan at the halfway mark. The macarons are ready with they have a crisp shell and the frilly foot at the bottom does not wobble when the shells are gently lifted from the mat. If they still wobble and stick – they are undercooked! Place the tray back in the oven for another 1-2 minutes and continue checking!
- Cool the shells for 10 minutes and then carefully peel the macarons off of the mat and set aside to cool completely. Using an offset spatula is an easy way to remove them from the mat – I’d recommend using one!
- Next, create the vanilla buttercream! Cream the soft butter with an electric mixer. Add the vanilla extract, then gradually add the sugar, ½ cup at a time. Scrape the sides of your bowl as you go. When the sugar is completely mixed in, add the milk and stir until incorporated.
- Finally, it is time to complete the macarons. Gently spread about a teaspoon of buttercream on the bottom of a macaron shell, then sandwich it together with another cookie. Allow the macarons to set for at least an hour for the cookies to set. Once assembled, they can be stored (covered) at room temperature for 24-48 hours. If you are waiting 2 days to eat them, I would suggest refrigerating them and removing from the fridge about an hour before serving so they can come to room temperature before serving. You can also keep the cookies (without filling) in airtight containers for up to a week. Enjoy!!!


Oh my goodness! I cannot bake at all, so I guess if I start anywhere it won’t be with a macaroons. . . Good for you for tackling such a tedious baking project! :o)
xo
I can say, I think you perfected these little guys!